Entry approval is a Gravity View feature I use often. Even if I’m not using Gravity View on a project that needs to filter out some entries, I’ll save the same data in the $wpdb->_gf_entry_meta table to be compatible. The meta key is_approved contains one of the values in the table below.
I learned that the .org docs page content is generated by scanning the project source code, extracting PHPDoc comments, and parsing them into custom post types. The piece of software that does that is https://github.com/WordPress/phpdoc-parser.
Build the Data
Add PHPDoc comments to all classes and methods in your plugin.
This SVN command will download the whole theme. Paste the command into a terminal or command prompt window:
svn co https://meta.svn.wordpress.org/sites/trunk/wordpress.org/public_html/wp-content/themes/pub/wporg-developer/
Copy these files from wporg-developer into your child theme
/inc
/js
/reference
/stylesheets
content-reference.php
content-reference-archive.php
functions.php (comingle it with your functions.php)
Theme Mods
Change option value wp_parser_root_import_dir to contain a path to the project. For me, this path points to a plugin in the wp-content/plugins folder.
Change get_template_directory_uri() calls to get_stylesheet_directory_uri() calls
Create single.php by taking a copy from the parent theme. Modify it to serve a different content template for the post types populated by phpdoc-parser. Here is a code sample that shows what to change to create a Twenty Twenty-One child theme.
Optional: Change “View on Trac” links I added two filters that wrap the URL and the text in the “View on Trac” link below the source code section of each page. These changes allow me to change the links to “View on Github” or wherever I want.
In early 2024, I redesigned inventorypresser.com using a Twenty Twenty Four child theme. I followed my own instructions in this post. I’ve published the child theme for anyone to use at https://github.com/fridaysystems/exteriordoor
WP Parser creates the content in the Build the Data step above.
WP Parser – Deleter By me, Corey Salzano. keeps track of every post created or updated by phpdoc-parser. Deletes untouched posts and empty taxonomy terms after wp-parser runs.
If no source code is displaying, edit the option wp_parser_root_import_dir to contain a full path to the directory of the plugin. Example: /corey/sites/inventorypress/wp-content/plugins/inventory-presser
Automating Updates to Docs
When I wrote this post in 2021, the site I built this for was hosted at WP Engine. I no longer use this Github Action:
I wrote a Github Action to automate the creation and updating of the docs pages. When I push to the master branch of my plugin’s repo, the plugin is deployed to the site on WP Engine where the docs pages are hosted, and the wp-cli command that generates the docs is run.
I built a WordPress plugin that saves a copy of all Gravity Forms entries in a Google Sheet as they are received. Entries to Google Sheet is the glue between a Gravity Form and a Google Sheet.
This is confusing: calls to get_fields() find no Advanced Custom Fields values saved with a specific post, but calls to get_field() find values for the same post.
This happens when ACF did not insert the field values, and the secondary value with the meta_key beginning with an underscore does not exist.
The post has the values, but the Advanced Custom Fields plugin expects an additional value in a hidden field for each field.
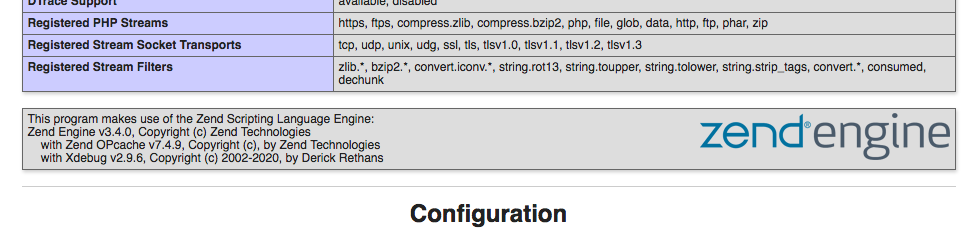
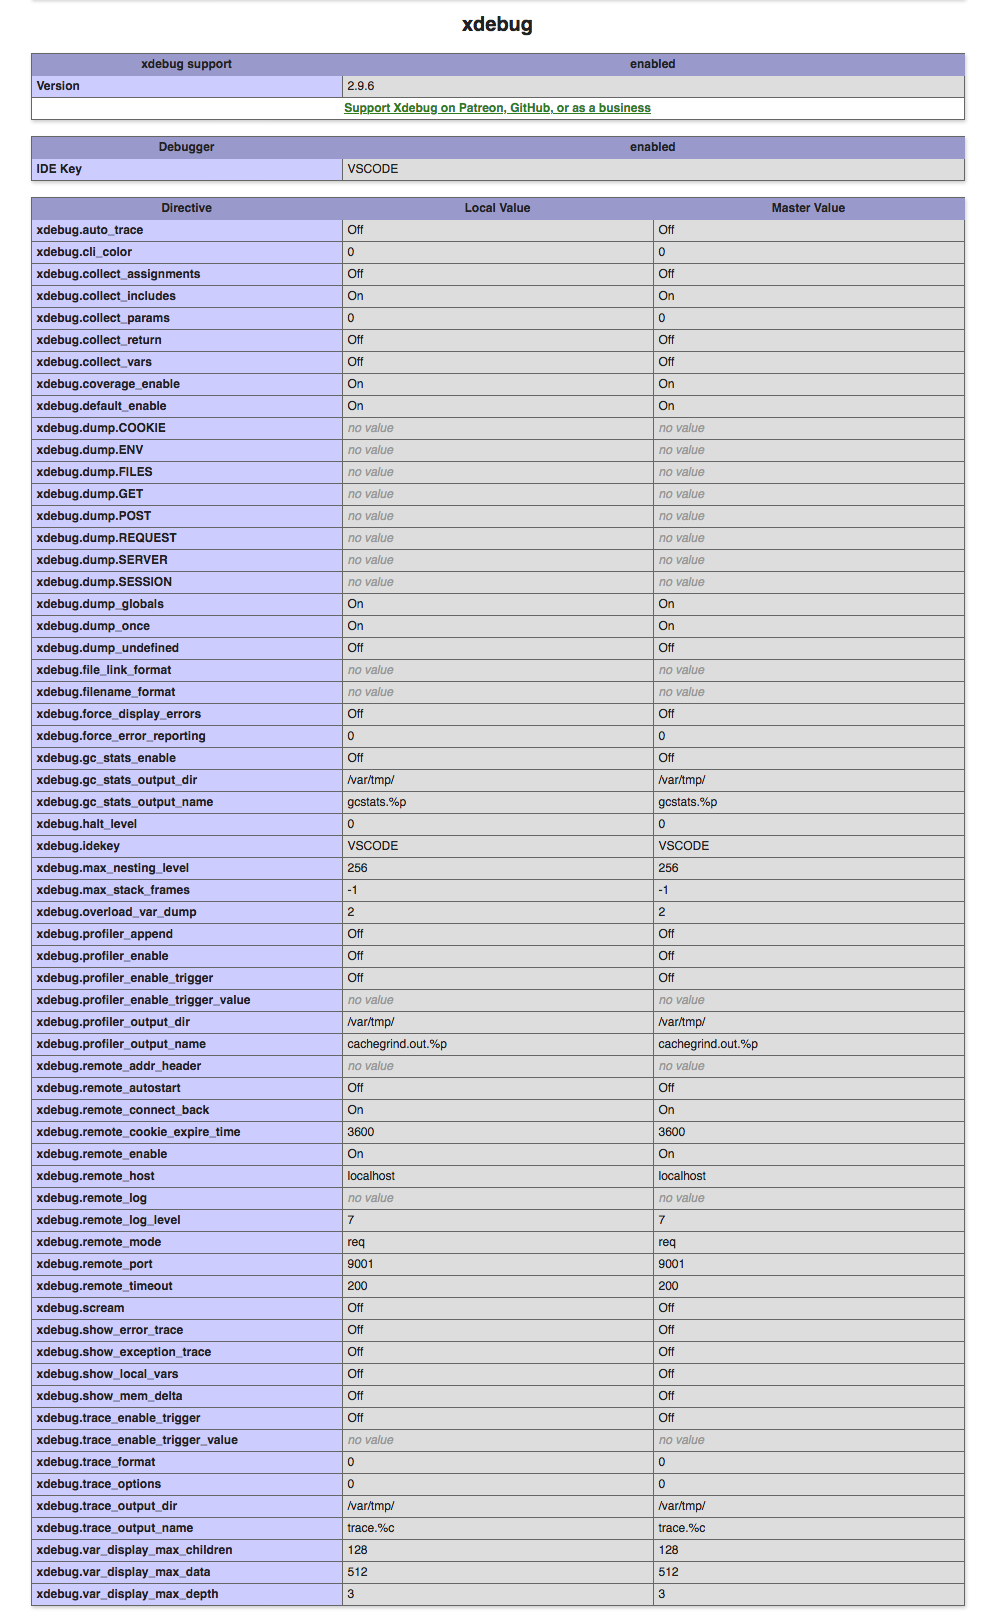
Anytime xDebug examines PHP files, it will create log entries if its configuration specifies a log file location. I found that log entries were created when Valet was starting up but not when pages were loaded in the browser.
The remote_log and remote_log_level settings are commented-out with semicolons because my configuration is now working. A log level value of 10 will grow the log file to hundreds of megabytes in just a few hours of loading pages.
Do not try to prettify the ext-xdebug.ini file by putting spaces around the equals signs. My breakthrough to a working debugger occurred shortly after I removed spaces from ext-xdebug.ini, updated Valet, and restarted my computer.
Contents of VS .code-workspace file
{
	"folders": [
		{
			"path": "."
		}
	],
	"settings": {},
	"launch": {
		// Use IntelliSense to learn about possible attributes.
		// Hover to view descriptions of existing attributes.
		// For more information, visit: https://go.microsoft.com/fwlink/?linkid=830387
		"version": "0.2.0",
		"configurations": [
			{
				"name": "Listen for XDebug",
				"type": "php",
				"request": "launch",
				"port": 9001
			},
			{
				"name": "Launch currently open script",
				"type": "php",
				"request": "launch",
				"program": "${file}",
				"stopOnEntry": true,
				"cwd": "${fileDirname}",
				"port": 9001,
				"runtimeExecutable": "/usr/local/Cellar/php/7.4.9/bin/php",
				"pathMappings": {
					"/Users/Corey/Sites/sitename": "${workspaceFolder}"
				}
			}
		]
	}
}
The runtimeExecutable value points to the PHP executable installed by homebrew. The pathMappings value points to the place where this website lives on my computer.
Stop and restart the debugger in VS Code everytime you change the workspace file or the web server is restarted.
M1 Processor
I got a new Macbook, and restored my old Intel processor back up to it. That means there are two versions of homebrew on my computer now, and I got into a situation where phpInfo() calls on web pages returned a different version of PHP than php -v in terminal. This fixed that, but I do not know why:
Migrate Specific Posts or Attachments With a Third WordPress Install
Duplicate the Site and Delete Posts That Won’t Move
The Built-in Tools > Export Feature Preserves Post IDs
An easy way to move WordPress content from one site to another is with the built-in XML import and export scripts located under the Tools menu. This tool does not allow users to export only specific posts, attachments, or other content. If you want Posts and Media, you get them all. Here is how I worked around this limitation to migrate 700 specific attachments among thousands.
Use a Third WordPress Install
I duplicated the site to a third, throwaway instance of WordPress using exfil, deleted the attachments I was not interested in (so only the attachments I wanted to move remained), and exported all Media with Tools > Export.
The Hard Part is Deleting All The Posts That Won’t Move
Deleting a few thousand attachments from WordPress is not fast using PHP. Like me, you might imagine writing a small loop with a call to wp_delete_attachment() inside. This is painful, and I do not recommend. (My local Laravel Valet development environment skid to a stop, and after many valet restart to rescue my local server, I decided to move on.)
I probably could have used a database query like DELETE FROM wp_posts WHERE ID NOT IN ( 32281, 32279, ... ), but I opted for the assistance of wp-cli, the WordPress Command Line Interface. This giant command to delete attachments by providing all of their IDs works great and finishes in under one minute:
The --force argument skips Trash and permanently deletes.
What Gave Birth to That Hideous Command
I wrote a bit of PHP to find the post IDs of attachments I wanted to migrate, and used the exclude argument in a get_posts() call to find the post IDs of all other attachments in the site. Then, I built the above wp-cli command in a string, and wrote it to a text file.
After deleting all the posts that should not be migrated, I was then ready to run Tools > Export for Media. The resulting XML file only contains attachments that remain after the massive deletion. The file also has URLs containing .test domains for my local environment, so I replaced those with the production domain. These URL changes mean the attachments will be pulled from the production site, not my local copy that’s only accessible from on my computer.
Provide the XML file to the WordPress importer at Tools > Import. Some servers will kill PHP processes that run longer than a specific amount of time. It’s OK to re-run the Import until it finishes. Because post IDs are preserved, no duplicate posts will result from running an XML import more than once.
I have written and released a bash script that extracts WordPress websites and updates their local copies in my computer. It’s called exfil, it’s free and open-source, and lives on Github at https://github.com/csalzano/exfil/.
I plan to use this script for years because it saves time and is already better than the migration plugin I was using previously. Let me know if you try it or have a better script I could learn from.
I switched to Laravel Valet for local WordPress development on my Macbook in December 2019. I love it. I presented at January’s WordPress Lancaster meetup about how and why I made the move.
This week, I’ve written some code that protects uploads to the WordPress Media Library. (Did you know that anyone can view uploads if they find the URLs? The Media Library uses only security by obscurity.) To code my solution, I’m using an .htaccess file to protect a subfolder in wp-content/uploads.
There is No .htaccess in Nginx
.htaccess files do not work in Laravel Valet because it uses the nginx web server instead of Apache. (And, Valet does not use a reverse proxy to allow Apache features to work while running the faster nginx.) nginx does not allow its configuration to be changed on-the-fly, and that’s one reason it’s faster than Apache.
To replicate the protected folder mechanism, I learned how to block access to a directory inside an nginx configuration file, but that introduced a new challenge: Where is the nginx configuration file? Most resources will identify usr/local/etc/nginx/nginx.conf as the configuration file, and while that’s correct, changing it and restarting Valet did not change the behavior of the folder.
Nginx Config File Location for Laravel Valet
Each site you create inside Valet gets its own configuration file at this location: ~/.config/valet/Nginx/sitename.test This is the file you should edit.
Restart Valet to Allow Configuration Changes to be Loaded
Nginx needs to be restarted in order for configuration changes to take effect, and I found it easy to use this command inside Terminal: valet restart
I recently bought my first mechanical keyboard. The COVID-19 pandemic means I’m switching between my Macbook and a Windows machine throughout the week at the same desk, and while I was comfortable typing on the Macbook, this HP Spectre keyboard and I do not get along. The differences in shortcuts for copy and paste alone were causing me to make enough mistakes to know it was time to invest in a peripheral keyboard.
Alas, I’ve made the leap to a mechanical keyboard, a Durgod K320 in space grey with Cherry Silent Red switches (120$ shipped). Typically, I’m the kind of guy who buys whatever Wirecutter recommends, but their suggestions for mechanical keyboards are bad ones.
Features you Should Demand of a Mechanical Keyboard
the ability to remap any key
multiple profiles of key mappings
Wirecutter recommends the Varmilo VA87M and the Leopold FC750R. I couldn’t determine if these keyboards include software that makes it easy to remap keys while shopping. The Leopold’s keycaps don’t have legends for the multimedia controls of the function keys, so users will have to memorize the alternate roles of F5 through F12, print their own legend, or change the keycaps. I can’t support these accessibility shortcomings.
Durgod Zeus Engine Only Runs on Windows
The keyboard I bought has companion software to customize the key map and save multiple profiles. That software is called Durgod Zeus Engine, and it only runs on Windows. That might be a showstopper for some, but not I. The current version of Zeus Engine is 1.0.2.12, and it is much better easier to use compared to when I first bought this keyboard.
The changes I’ve made to make this keyboard macOS friendly are as follows:
Swap Left Ctrl and Left Windows keys (macOS’ command defaults to the Left Windows key instead of Alt, which is weird and why freedom to customize is important.)
Out of the box, The Events Calendar plugin for WordPress is amazing and a pleasure to work with as a developer. However, it does not show users Media Library uploads that are attached to event posts.
As of this writing, it is not possible to delete a meta value using the WordPress REST API. Post meta updates must be communicated while inserting and updating post objects, and the only way to “remove” meta fields is to write blank values over their current values.
I wrote a free and open-source plugin to provide granular control over post and term meta fields. It lives on Github. The plugin is called Manipulate Meta with the WP API, and it extends the REST API to allow one request to retrieve, update, or delete a meta field independently from a post or term object.
The instructions are located in the repo’s README.md.
Are you getting this error from Azure SQL Server? Login failed on ServerName.database.windows.net.DatabaseName Please verify that the shards are accessible and that the credential information affiliated with external data source ExternalDataSourceName is correct.
When I ran into this error while migrating a SQL Server instance to Azure and designing External Tables, it was because the user I specified as the IDENTITY during DATABASE SCOPED CREDENTIAL creation had a different password that the LOGIN of the same name in the Master database.
Say we create a user in the Master database like this:
CREATE LOGIN ExternalTableAdministrator WITH PASSWORD = 'Nr26MY4@Q407inLE83[I7L$~5j5UL';
Later, when creating a database-scoped credential (and specifying this user as the identity), make sure to use the same password:
CREATE DATABASE SCOPED CREDENTIAL [ExternalTableCred]
    WITH IDENTITY = 'ExternalTableAdministrator',
    SECRET = 'Nr26MY4@Q407inLE83[I7L$~5j5UL';
GO